A step-by-step guide on how to start a blog.
Disclaimer: Some of the links on this page may be affiliate links. That means if you purchase one of the products listed, I may receive a small commission. This doesn’t change the amount you pay, it just helps me keep the lights on at Mince HQ! I only recommend products I use and trust. Thanks for supporting the blog!
Even though I have a Food blog, I have experience working on blogs in different industries so this advice would be helpful for anyone looking to start a blog, no matter the content.
So you’ve decided to start a blog and claim your own little piece of the internet! I like your style. Blogging can be a really fun and rewarding experience. It can help connect you with like-minded individuals, build an audience, learn new things and even make you money. There are countless individuals who have quit their day jobs and make a full time income blogging.
So I put together this Step-by-step Guide on How to Start a Blog to help you out and get you started. Let’s get going!
- Choose a Domain & Get Hosting
- Install WordPress
- Set up a Theme and Make it Beautiful
Step 1. Choose a Domain & Get Hosting
Domain
First things first, come up with a name. Try to choose something catchy that is not too long and encompasses what your blog will be about.
My blog name is Mince Republic and my domain name is mincerepublic.com. The process for coming up with the name was a tribute to my last name, Demint, used as a cooking term, “Mince” and Republic because I like to think of this space as a republic of and for foodies.
If you’re having trouble coming up with a name, try writing out a bunch of words you like and combining them to see if you can come up with a winning combination.
Once you’ve come up with a few possibilities, check to make sure your domain name is available.
I think the easiest way to do this is just to go to www.godaddy.com and type in the domain name you’re thinking of plus .com and then see if it’s available.
You want to make sure your blog name is available as a dot com, i.e. yourfoodblog.COM. Though there are other options available, dot com is the most widely used and will be the easiest for people to find you and remember your website.
Once you find a domain that is available, you’re ready to host your blog!
Hosting
The easiest way to think about how a domain and hosting work together is to think of a domain as the address of your blog and hosting as the digital “land” your blog is on. The hosting provider you choose is an important decision because it’s imperative to have a good host as this effects site speed and how quickly problems are resolved if they should come up.
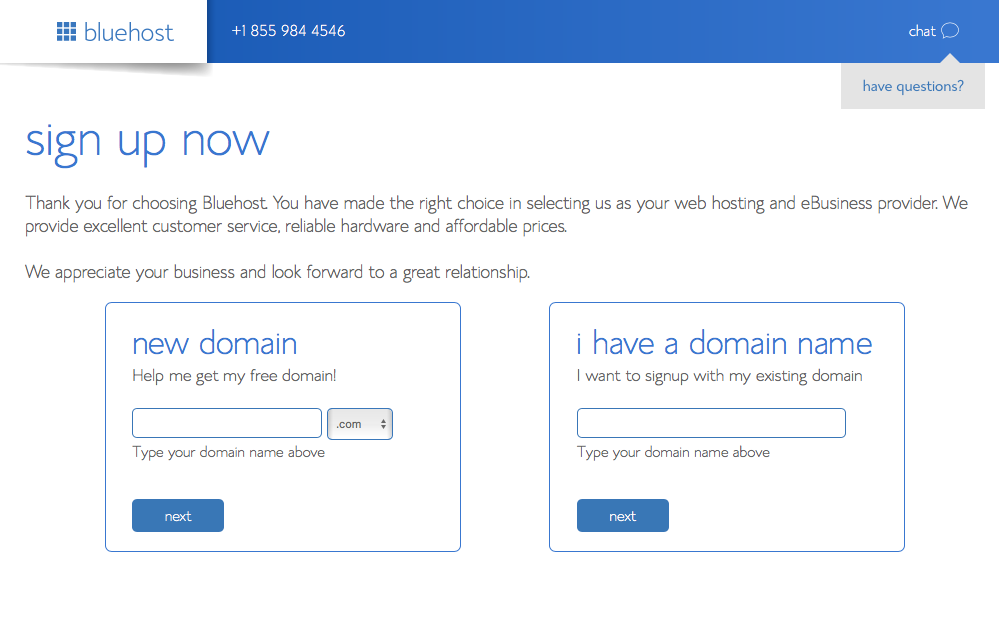
I use and recommend Bluehost because it’s incredibly simple to set up, it’s affordable and when you sign up with their hosting plan you’ll get a free domain name. This is a great deal, especially for someone just starting out!
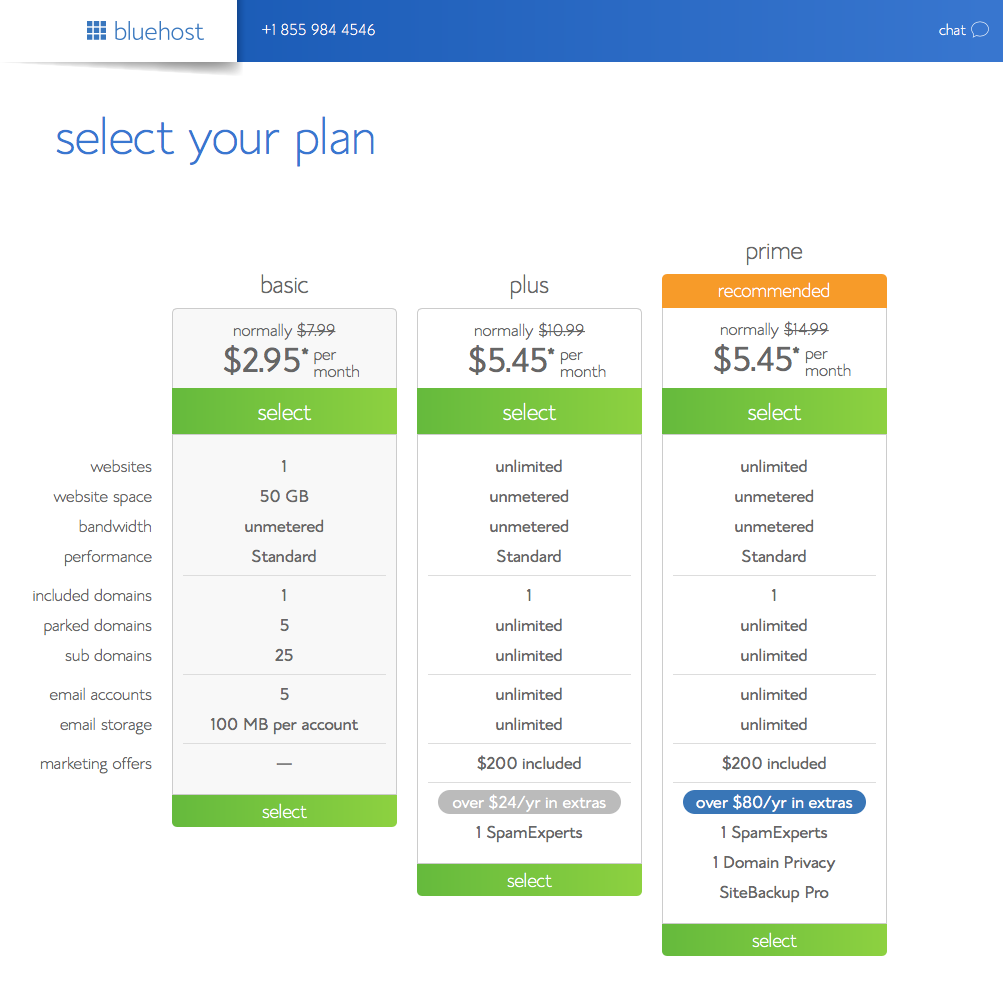
I recommend the Basic Plan. If you sign up for 36 months, it will break down to $2.96 per month, however, please note that you will be charged for the full price upfront. If you want to do a shorter term, you can sign up for 24 months at $3.95 per month or 12 months at 4.95 per month.
I would recommend signing up for the 36 months because it’s a great deal and it will cost you a total of $118.08. It is well worth the investment and it saves you $181.44 (63% off!). In this price, I’ve also included Domain Privacy protection which is $0.99 per month. I would opt to include Domain Privacy Protection because it shields your personal information (address and phone number) from being displayed publicly.
Click here to host your blog on Bluehost.
Step 2. Install WordPress
Once you’ve set up Bluehost, you’re going to want to install WordPress.
WordPress is a CMS (Content Management System) and an excellent blogging software. It’s perfect for people who don’t want to or don’t know how to create a website or blog from scratch but want to have some flexibility in the way their blog looks and the ability to manage it themselves. WordPress has a lot of great plugins that will be really helpful along the way.
It’s very easy to use and easy to set up. It’s what I use for Mince and I can’t see myself ever changing.
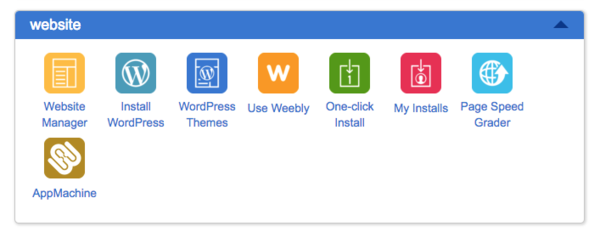
To install, login to your Bluehost account and simply click the install WordPress button. You will then be taken to a page to install for free (do it yourself) or you can pay to have someone do it for you. It’s up to you on how much help you want and what your budget is. I installed it myself because it’s fairly straightforward.
Once you click install, it will check your domain. Once cleared, check the terms and conditions box and click “Install Now”.
Congrats – you’ve installed WordPress!
Step 3. Set Up a Theme
Now that you’ve got your website up and your blog software, it’s time to give your space some personality. To continue with our house metaphor, this is where we build the house and make it beautiful with all of the finishing touches.
WordPress has a ton of free themes you can pick from which you can find here. Otherwise, you can get a premium theme (this is what I have).
Genesis Framework by StudioPress
This is the framework I use on Mince. Think of the framework as just that, the frame of your house. Genesis makes it incredibly easy to manipulate themes to your liking and add widgets (a small block on your site that allows you add different functions such as a social media bar or email subscription bar, etc.).
If you get the Genesis Framework, then you can get one of the StudioPress themes to run on top of Genesis. These work hand in hand. Think of Genesis as the framing of your house and the theme as everything that makes it beautiful, dry wall, paint colors, decor.
Click here to get the Genesis Framework.
Click here to download The Genesis Guide for Absolute Beginners.
Foodie Theme by Shay Bocks
Currently, I’m using the Foodie Theme by Shay Bocks. It’s perfect for me because it has a lot of great features made specifically for food blogs. Shay Bocks has also made the Foodie Pro Theme and Brunch Pro both of which I would recommend. These include recipe implementation which makes it a no brainer for a food blogger.
Click here to get the Foodie Pro Theme.
Click here to get the Brunch Pro Theme.
Click here to get the Cook’d Pro Theme.
Elegant Themes
Another option to find a theme would be at Elegant Themes. These themes look great and are easy to use and are also a little bit on the cheaper side.
Click here to get Elegant Themes.
When you buy the framework and theme, or just a theme, it will come with instructions on how to install it and begin to use it.
That’s it, you’re finished! Now your blog is set up and ready to go! Congratulations.
Want more help? Click here to check out helpful blogger resources and tools.
Disclaimer: Please note that some of these links are affiliate links and I will earn a commission if you purchase through those links. This doesn’t affect the price for you, it just helps me keep the lights on at Mince HQ! Thank you for supporting the blog! I only recommend products I use and trust. If you have any questions, please don’t hesitate to ask.)
This is a great resource kayla! I have been “trying” to write a bog for a couple years. Even have the name and domain. Will read this over thoroughly and might be asking you some questions!!
*blog
Glad it was helpful! Ya definitely let me know if you have any questions!